
Building a Fence on Concrete
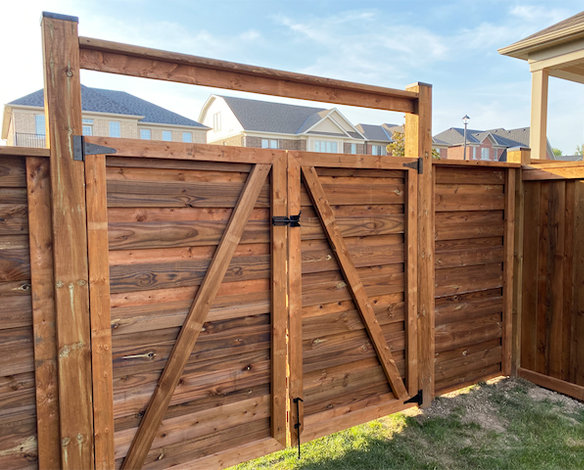
When it comes to building a fence on concrete, laying down a solid foundation is crucial, much like setting the groundwork for a successful project.
But what if the concrete surface isn’t perfectly smooth or level? How do you ensure your fence will be sturdy and secure in such conditions?
Let’s uncover the essential steps and techniques required to tackle this challenge effectively.
Tools and Materials Needed
What tools and materials do you need to build a fence on concrete? To successfully complete this project, you’ll need a few essential items. Firstly, you’ll require a hammer drill with masonry bits to drill into the concrete effectively. This tool is crucial for securing the fence posts firmly in place. Additionally, you’ll need concrete screws or anchors to attach the posts securely to the concrete surface. These fasteners are essential for providing stability and support to your fence structure.
Next, make sure you have a tape measure and level to ensure the fence posts are installed at the correct height and alignment. These tools are indispensable for achieving a straight and uniform fence. Furthermore, you’ll need a saw to cut any wooden or metal posts to the desired length. A post level can also be handy to ensure that each post is perfectly vertical during installation.
Lastly, gather safety equipment such as gloves, goggles, and ear protection to safeguard yourself during the construction process. By having these tools and materials ready, you’re well-equipped to build a sturdy fence on a concrete surface.
Preparing the Concrete Surface
Before installing your fence on concrete, ensure you start with a clean surface to promote proper adhesion. Use surface cleaning techniques like pressure washing or scrubbing with a solution to remove dirt and debris.
Additionally, assess the concrete for any damages and apply the necessary repair methods to ensure a sturdy foundation for your fence.
Surface Cleaning Techniques
To ensure optimal adhesion, thoroughly clean the concrete surface before beginning the fence installation. Start by removing any debris, dirt, or grease using a stiff brush or broom.
Next, wash the concrete surface with a mixture of water and a mild detergent, scrubbing away any stubborn stains. For tougher grime or mold, consider using a pressure washer on a low setting to avoid damaging the concrete.
After cleaning, rinse the surface thoroughly with clean water and allow it to dry completely before proceeding with the fence installation. Remember, a clean concrete surface will promote better adhesion for the fence components, ensuring a sturdy and long-lasting fence structure.
Concrete Repair Methods
Ensure the longevity and stability of your fence by addressing any concrete surface imperfections through effective repair methods before proceeding with the installation process.
Start by inspecting the concrete for cracks, holes, or uneven surfaces. For small cracks, use a concrete patching compound, applying it with a trowel and smoothing it out evenly. Larger cracks may require a vinyl concrete patching compound for added strength.
Fill holes with a concrete repair mix, following the manufacturer’s instructions. For uneven surfaces, consider grinding down high spots and filling in low areas.
Once the repairs are complete, ensure the concrete is clean and dry before moving on to installing your fence for a secure and long-lasting structure.
Marking Out Fence Line
Mark out the fence line accurately to ensure proper alignment and placement. Before starting, gather the necessary tools: measuring tape, string, stakes, and spray paint. Begin by measuring the distance from the starting point to the end point of your fence. Use stakes to mark these points and then run a string tightly between them. This string will serve as a guide for the fence line.
Next, mark the placement of each fence post along the line. Standard spacing is typically between 6 to 8 feet apart, but adjust based on the specific requirements of your fence design. Use spray paint to mark these spots on the concrete. Make sure the marks are visible and aligned correctly before proceeding.
Double-check the measurements and alignment before moving on to the next step. This initial marking out process is crucial for a straight and sturdy fence installation. Once you have the fence line accurately marked, you can proceed with installing anchor brackets for securing the fence posts to the concrete surface.
Installing Anchor Brackets
Check the alignment of the anchor brackets with the marked spots on the concrete before securing them in place. This step is crucial to ensure that your fence will be straight and sturdy. Place the brackets over the marked spots and make sure they’re positioned correctly before proceeding.
Using a drill with a masonry bit, start by making pilot holes through the holes in the brackets and into the concrete. This will help guide the screws and prevent the concrete from cracking. Once the pilot holes are in place, use concrete screws to secure the brackets to the concrete. Make sure the screws are tight to provide a strong foundation for your fence.
After all the brackets are securely attached to the concrete, double-check their alignment to guarantee that they’re level and in the correct position. This extra verification will save you time and effort in the long run by avoiding potential issues with the fence installation process.
Attaching Fence Posts
When attaching fence posts on concrete, focus on post anchoring techniques for stability.
Drill into the concrete and securely fasten the posts using appropriate hardware.
Utilize brackets to ensure the fence structure remains stable and durable.
Post Anchoring Techniques
For a secure foundation, firmly anchor your fence posts using reliable techniques.
Begin by selecting either wedge anchors or concrete screws based on your specific needs. To use wedge anchors, drill a hole into the concrete, insert the anchor, and tighten it with a wrench until secure.
For concrete screws, simply drill a pilot hole, then drive the screw into place.
Another option is to use a post base bracket secured with concrete screws or wedge anchors. Place the bracket over the concrete, mark the hole locations, drill, and attach the bracket.
Whichever method you choose, ensure the posts are plumb and level before securing them to the concrete for a sturdy and durable fence installation.
Drill and Secure
Secure your fence posts by drilling into the concrete and attaching them using wedge anchors, concrete screws, or post base brackets. When drilling into the concrete, ensure the holes are slightly deeper than the length of the anchors or screws for a secure fit.
- Wedge Anchors: These provide a strong hold by expanding within the concrete when tightened, offering stability and durability to your fence posts.
- Concrete Screws: Ideal for lighter fences, these screws are easy to install and provide a reliable connection between the post and the concrete base.
- Post Base Brackets: Offering flexibility, these brackets can be attached to the concrete first and then the posts, allowing for adjustments before finalizing the installation.
Brackets for Stability
To ensure maximum stability for your fence, consider utilizing specialized brackets when attaching the fence posts to the concrete base. Brackets designed for this purpose provide a secure connection point between the post and the concrete, reducing the risk of movement or shifting over time.
When selecting brackets, opt for ones made from durable materials like galvanized steel to withstand various weather conditions. Begin by positioning the bracket on the concrete surface and marking the holes for drilling. Use a hammer drill to create holes in the concrete, ensuring they’re deep and wide enough for anchor bolts.
Secure the bracket in place using anchor bolts and nuts, tightening them to firmly attach the fence post to the concrete base.
Securing Fence Panels
Consider using heavy-duty screws to attach the fence panels securely to the concrete base. This method provides a strong and reliable connection that can withstand various weather conditions and external forces. When securing fence panels on concrete, follow these essential tips for a successful installation:
- Pre-drill Holes: Before attaching the fence panels, pre-drill pilot holes into the concrete using a masonry drill bit. This step helps prevent the concrete from cracking and makes it easier to drive the screws in.
- Use Anchors: To enhance the stability of the connection, consider using anchors along with the screws. Anchors provide additional support and prevent the screws from loosening over time due to vibrations or wind.
- Apply Sealant: After securing the fence panels, apply a waterproof sealant around the screw heads and edges of the panels. This extra layer of protection helps prevent water infiltration, which can cause rusting and damage to the screws and panels.
Finishing Touches and Maintenance
For a polished look and long-lasting durability, ensure proper finishing touches and regular maintenance of your concrete-based fence. Once the concrete has set and the fence panels are securely attached, consider applying a sealant to protect the concrete from moisture and other environmental factors. A sealant will help prevent cracks and discoloration, extending the life of your fence. Additionally, you may want to paint or stain the fence to complement your outdoor aesthetic while providing an extra layer of protection.
Regular maintenance is key to preserving the integrity of your concrete fence. Inspect the fence periodically for any signs of damage, such as cracks or chips, and repair them promptly to prevent further deterioration. Clean the fence regularly to remove dirt, grime, and mildew that can accumulate over time. Use a gentle cleanser and a soft brush to avoid damaging the concrete surface. By staying proactive with maintenance, you can ensure that your concrete fence remains a sturdy and attractive addition to your property for years to come.
Frequently Asked Questions
Can a Fence Be Built Directly on Top of an Existing Concrete Slab?
Yes, a fence can be built directly on top of an existing concrete slab. It provides a stable foundation and can save time and effort compared to digging posts. Proper anchoring techniques are crucial for a secure installation.
How Deep Should the Fence Posts Be Anchored Into the Concrete?
When anchoring fence posts into concrete, ensure a depth of at least 2 feet for stability. Use a post hole digger to create holes, insert posts, and secure with concrete for a durable fence structure.
Is It Possible to Install a Gate in a Concrete Fence?
Yes, you can install a gate in a concrete fence. It requires proper tools and equipment. Ensure the gate’s hinges and latch are securely anchored to the concrete, providing stability and functionality for your fence.
What Are Some Common Challenges When Building a Fence on Concrete?
When building a fence on concrete, common challenges include anchoring securely, drilling through tough surfaces, and ensuring proper alignment. You’ll need specialized tools and techniques to overcome these obstacles effectively.
Are There Any Special Considerations for Building a Fence on a Sloped Concrete Surface?
When building a fence on a sloped concrete surface, you must ensure proper alignment and stability. Consider using adjustable brackets or longer posts to accommodate the slope. It’s important to maintain consistent height and aesthetics throughout.
Conclusion
Now that your fence is securely installed on concrete, you can enjoy the added privacy and security it provides to your property.
Make sure to regularly inspect and maintain the fence to ensure its longevity and effectiveness.
With the proper tools and materials, installing a fence on concrete can be a straightforward and rewarding DIY project.
Enjoy your newly fenced-in area!